On this page
Set Up MQTT
Available from the Plus plan.
MQTT is a lightweight pub/sub protocol suited for IoT platforms, building automation, and automated dashboards. energiedaten.at publishes new readings (T-1, values from the previous day) as MQTT messages to your own broker.
When to Use MQTT
MQTT is the right choice when you want to integrate data into one of the following platforms:
- ThingsBoard or comparable IoT backends
- Custom MQTT-based data pipelines (e.g. EnerChart)
If you want to send data to a web application or a REST endpoint, use a Webhook instead.
Set Up a Connection
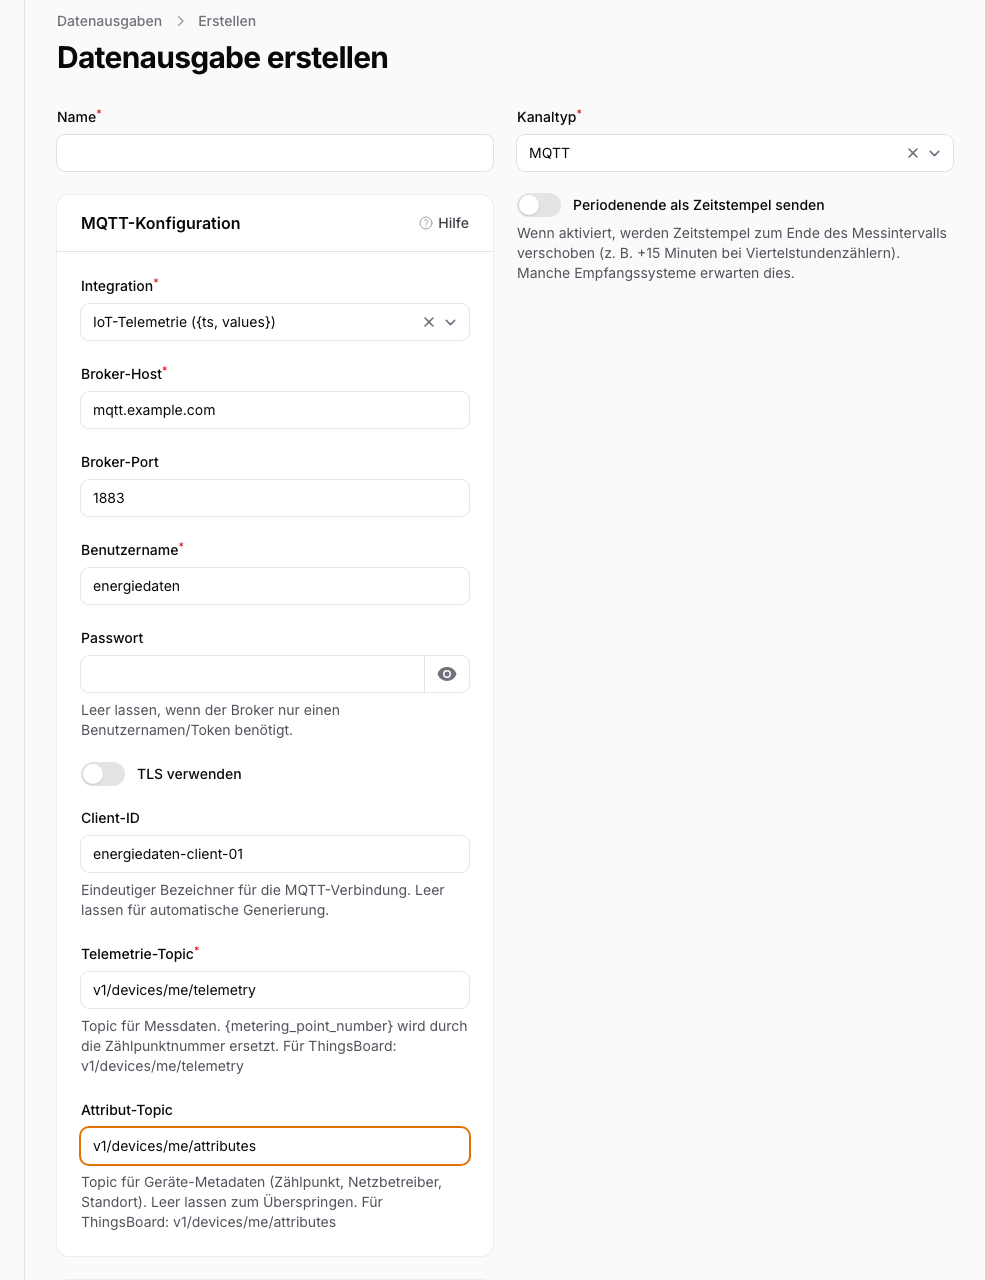
- Go to Data → Integrations → New Integration.
- Select the type MQTT.
- Fill in the connection details:
| Field | Description |
|---|---|
| Broker host | Hostname or IP address of your MQTT broker |
| Port | Default: 1883 (unencrypted) or 8883 (TLS) |
| TLS | Recommended for brokers outside your local network |
| Client ID | Unique identifier for this connection at the broker (generated automatically if you leave the field empty) |
| Username | Required. For ThingsBoard, enter the device access token here. |
| Password | Optional. Leave empty if the broker only requires a username or token. |
| Telemetry topic | Topic for the measurement data, v1/devices/me/telemetry by default. {metering_point_number} is replaced with the metering point number. |
| Attributes topic | Optional topic for device metadata (metering point, grid operator, location). Leave empty to skip. |
- Save the connection and assign the meters you want under Assigned meters.
Test a Connection
Click Send Test to publish a test message to the broker. Check in your MQTT client whether the message arrives on the configured topic.
If errors occur, check the delivery details under Delivery Logs & Errors.
